Image Classification
The tutorial explores the basis of image classification task. This document contains the explanations of arguments of each script.
You can find the tutorial for finetuning a pretrained model on custom dataset under the tutorial folder, tutorial/README.md.
The ipython notebook tutorial is also prepared under the tutorial folder as tutorial/tutorial.ipynb. You may upload and run this ipython notebook on Google colab.
Image Classification is a fundamental task that attempts to classify the image by assigning it to a specific label. Our AI training platform provides the training script to train a classification model for image classification task.
Prerequisites
First of all, we have to install the libraries. Python 3.6 or above is required. For other libraries, you can check the requirements.txt file. Installing these packages is simple. You can install them by running:
pip install -r requirements.txtDataset & Preparation
Next, we need a dataset for the training model.
Custom Datasets
You can train the model on a custom dataset. Your own datasets are expected to have the following structure:
- Dataset name
    -- train
        --- Class1
        --- Class2

    -- val
        --- Class1
        --- Class2
Example
Let's go through a toy example for preparing a custom dataset. Suppose we are going to classify bees and ants.
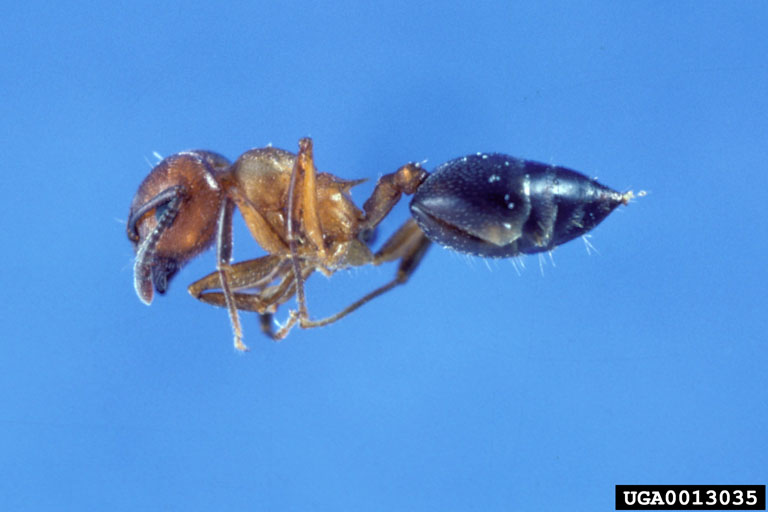
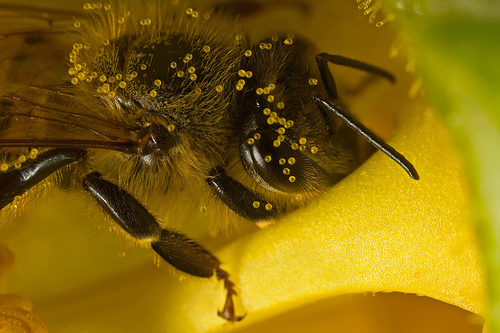
- image data
    -- train
        --- ants
        --- bees

    -- val
        --- ants
        --- bees
Now, we have finished preparing the dataset.
Train
Let's look at how to train or finetune a model. There are several backbone models and arguments to choose. You can find the FPS results of these backbone models evaluated on 520 and 720 in the next section.
For training on a custom dataset, run:
python train.py --gpu -1 --backbone backbone_name --model-def-path path_to_model_definition_folder --snapshot path_to_pretrained_model_weights path_to_dataset_folder--gpu which gpu to run. (-1 if cpu)
--workers the number of dataloader workers. (Default: 1)
--backbone which backbone model to use. Options: see Models(#Models).
--freeze-backbone whether freeze the backbone when the pretrained model is used. (Default: 0)
--early-stop whether early stopping when validation accuracy increases. (Default: 1)
--patience patience for early stopping. (Default: 7)
--model-name name of your model.
--lr learning rate. (Default: 1e-3)
--model-def-path path to pretrained model definition folder. (Default: './models/')
--snapshot path to the pretrained model. (Default: None)
--epochs number of epochs to train. (Default: 100)
--batch-size size of the batches. (Default: 64)
--snapshot-path path to store snapshots of models during training. (Default: 'snapshots/{}'.format(today))
--optimizer optimizer for training. Options: SGD, ASGD, ADAM. (Default: SGD)
--loss loss function. Options: cross_entropy. (Default: cross_entropy)
Converting to ONNX
You may check the Toolchain manual for converting PyTorch model to ONNX model. Let's go through an example for converting FP_classifier PyTorch model to ONNX model.
Execute commands in the folder classification:
python pytorch2onnx.py --backbone backbone_name --num_classes the_number_of_classes --snapshot pytorch_model_path --save-path onnx_model_path--save-path path to save the onnx model.
--backbone which backbone model to use. Options: see Models(#Models).
--num_classes the number of classes.
--model-def-path path to pretrained model definition
--snapshot path to the pretrained model.
We could get pytorch to onnx model.
Then, execute commands in the folder ONNX_Convertor/optimizer_scripts:
(reference: https://github.com/kneron/ONNX_Convertor/tree/master/optimizer_scripts)
python pytorch_exported_onnx_preprocess.py onnx_model_path onnx_model_convert_path
We could get converted onnx model.
Inference
In this section, we will go through using a trained network for inference. That is, we will use the function inference.py that takes an image and predict the class label for the image. inference.py returns the top \(K\) most likely classes along with the probabilities.
For inference on a image, run:
python train.py --gpu -1 --backbone backbone_name --model-def-path path_to_model_definition_folder --snapshot path_to_pretrained_model_weights path_to_dataset_folder--gpu which gpu to run. (-1 if cpu)
--backbone which backbone model to use. Options: see Models(#Models).
--model-def-path path to pretrained model definition folder. (Default: './models/')
--snapshot path to the pretrained model. (Default: None)
--img-path Path to the image.
--class_id_path path to the class id mapping file. (Default: './eval_utils/class_id.json')
--save-path path to save the classification result. (Default: 'inference_result.json')
--onnx whether inference onnx model
You could find preprocessing and postprocessing processes in inference.py.
Evaluation
Evaluation Metric
We will consider top-K score, precision, recall and F1 score for evaluating our model. You can find the script for computing these metrics in eval_utils/eval.py.
top-K score: This metric computes the number of times where the correct label is among the top k labels predicted (ranked by predicted scores). Note that the multilabel case isn’t covered here.
precision: The precision is the ratio tp / (tp + fp) where tp is the number of true positives and fp the number of false positives. The precision is intuitively the ability of the classifier not to label as positive a sample that is negative. The best value is 1 and the worst value is 0.
recall: The recall is the ratio tp / (tp + fn) where tp is the number of true positives and fn the number of false negatives. The recall is intuitively the ability of the classifier to find all the positive samples. The best value is 1 and the worst value is 0.
F1 score: The F1 score can be interpreted as a weighted average of the precision and recall, where an F1 score reaches its best value at 1 and worst score at 0. The relative contribution of precision and recall to the F1 score are equal. The formula for the F1 score is:
F1 = 2 * (precision * recall) / (precision + recall).
Evaluation on a dataset
In this section, we will go through evaluating a trained network on a dataset. Here, we are going to evaluate a pretrained model on the validation set of the custom dataset. The ./eval_utils/eval.py will report the top-K score, precision, recall and F1 score for the model evaluated on a testing dataset. The evaluation statistics will be saved to eval_results.txt.
python eval_utils/eval.py --gpu -1 --backbone backbone_name --snapshot path_to_pretrained_model_weights --model-def-path path_to_model_definition_folder --data-dir path_to_dataset_folder--gpu which gpu to run. (-1 if cpu)
--backbone which backbone model to use. Options: see Models(#Models).
--model-def-path path to pretrained model definition folder. (Default: './models/')
--snapshot path to the pretrained model weight. (Default: None)
--data-dir path to dataset folder. (Default: None)
End-to-End Evaluation
For end-to-end testing, we expect that the prediction results are saved into json files, one json file for one image, with the following format:
{"img_path": image_path,
 "0_0":[[score, label], [score, label], ...]
}{image1_path: label,
image2_path: label,
...
}classification:
python eval_utils/eval.py --preds path_to_predicted_results --gts path_to_ground_truth --preds path to predicted results. (e2e eval)
--gts path to ground truth. (e2e eval)
The evaluation statistics will be saved to eval_results.txt.
Models
| Model | Input Size | FPS on 520 | FPS on 720 | Model Size |
|---|---|---|---|---|
| FP_classifier | 56x32 | 323.471 | 3370.47 | 5.1M |
| mobilenetv2 | 224x224 | 58.9418 | 620.677 | 14M |
| resnet18 | 224x224 | 20.4376 | 141.371 | 46.9M |
| resnet50 | 224x224 | 6.32576 | 49.0828 | 102.9M |
| efficientnet-b0 | 224x224 | 42.3118 | 157.482 | 18.6M |
| efficientnet-b1 | 224x224 | 28.0051 | 110.907 | 26.7M |
| efficientnet-b2 | 224x224 | 24.164 | 101.598 | 31.1M |
| efficientnet-b3 | 224x224 | 18.4925 | 71.9006 | 41.4M |
| efficientnet-b4 | 224x224 | 12.1506 | 52.3374 | 64.7M |
| efficientnet-b5 | 224x224 | 7.7483 | 35.4869 | 100.7M |
| efficientnet-b6 | 224x224 | 4.96453 | 26.5797 | 141.9M |
| efficientnet-b7 | 224x224 | 3.35853 | 17.9795 | 217.4M |
Note that for EfficientNet, Squeeze-and-Excitation layers are removed and Swish function is replaced by ReLU.
FP_classifier is a pretrained model for classifying person and background images. The class id label mapping file is saved as ./eval_utils/person_class_id.json.
| \ | FP_classifier | mobilenetv2 | resnet18 | resnet50 |
|---|---|---|---|---|
| Rank 1 | 94.13% | 69.82% | 66.46% | 72.80% |
| Rank 5 | - | 89.29% | 87.09% | 90.91% |
Resnet50 is currently under training for Kneron preprocessing.